Appearance
SpriteSheet Decorator
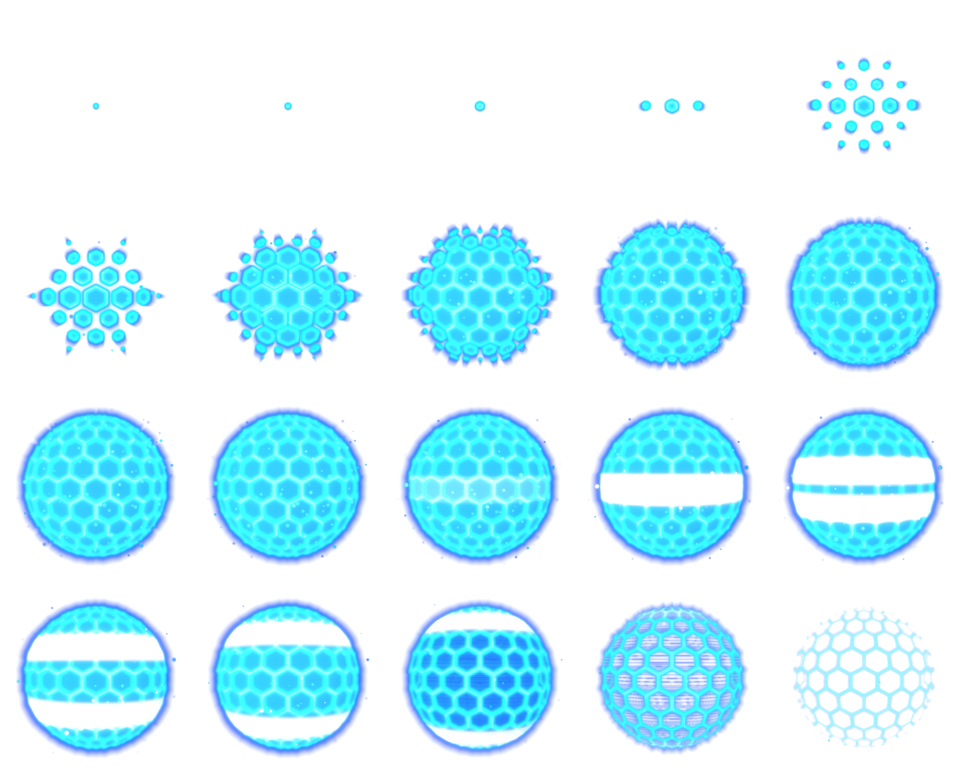
Example SpriteSheet
ts
import { Spritesheet } from '@rpgjs/client'

const to = () => {
    const array: any = []
    let k = 0
    const durationFrame = 5
    for (let i=0 ; i < 4 ; i++) {
        for (let j=0 ; j < 5 ; j++) {
            array.push({ time: k * durationFrame, frameX: j, frameY: i })
            k++
        }
    }
    // This last beat allows the last frame to be played, otherwise the animation ends abruptly at the last frame. This can be considered as the total animation time.
    array.push({ time: k * durationFrame })
    return array
}

@Spritesheet({
    id: 'shield',
    image: require('./assets/animation.png'),
    framesWidth: 5,
    framesHeight: 4,
    width: 960,
    height: 768,
    opacity: 1,
    anchor: [0.5],
    textures: {
        default: {
            /*
            animations: [
                [
                    { time: 0, frameX: 0, frameY: 0 },
                    { time: 5, frameX: 1, frameY: 0 } ,
                    { time: 10, frameX: 2, frameY: 0 } ,
                    { time: 15, frameX: 3, frameY: 0 }
                    // etc...
                ]
            ]
            */
            animations: [ to() ]
        }
    }
})
export class ShieldAnimations {}
You can call the animation
Client Side
On the scene
ts
import { RpgSceneMapHooks, RpgSceneMap } from '@rpgjs/client'

export const sceneMap: RpgSceneMapHooks = {
    onAfterLoading(scene: RpgSceneMap) {
        scene.showAnimation({
             graphic: 'shield',
             animationName: 'default',
             attachTo: scene.getCurrentPlayer()
         })
    }
}Server Side
Use the showAnimation() command:
ts
player.showAnimation('shield', 'default')it will display the animation on the player and will be visible to all other players
Properties
Summary
opacity
- Property:
opacity - Type:
number - Optional:
true - Usage:
The global value of opacity (between 0 and 1)
pivot
- Property:
pivot - Type:
Array - Optional:
true - Usage:
The global value of pivot.
Invariant under rotation, scaling, and skewing. The projection of into the parent's space of the pivot is equal to position, regardless of the other three transformations. In other words, It is the center of rotation, scaling, and skewing.
The array has two elements: [x, y]. If y is omitted, both x and y will be set to x.
ts
pivot: [0.5, 0.8]anchor
- Property:
anchor - Type:
Array - Optional:
true - Usage:
The global value of anchor.
Position of the origin point
The array has two elements: [x, y]. If y is omitted, both x and y will be set to x.
ts
anchor: [0.5, 0.8]spriteRealSize
- Since: 3.2.0
- Property:
spriteRealSize - Type:
{ width: number, height: number } | number - Optional:
true - Usage:
Defines the actual size of the sprite that is inside a larger rectangle. For example, if the texture rectangle is 192x192 while the character, which is in the center, is only 64x64 then set spriteRealSize: 64. This way the character will be well positioned in relation to the animations that have a different rectangle
You can also put
spriteRealSize: { width: 64, height: 64 }but be aware that the width is not concerned because it will always be centered while the height depends on the hitbox
angle
- Property:
angle - Type:
number - Optional:
true - Usage:
The global value of rotation
Rotation. This will rotate the display object's projection by this angle (in radians).
rotation
- Property:
rotation - Type:
number - Optional:
true - Usage:
The global value of rotation
Rotation. This is an alias for rotation, but in degrees.
scale
- Property:
scale - Type:
Array - Optional:
true - Usage:
The global value of scale.
Scaling. This will stretch (or compress) the display object's projection. The scale factors are along the local coordinate axes. In other words, the display object is scaled before rotated or skewed. The center of scaling is the pivot.
The array has two elements: [x, y]. If y is omitted, both x and y will be set to x.
ts
scale: [0.5, 0.8]skew
- Property:
skew - Type:
Array - Optional:
true - Usage:
The global value of skew.
Skewing. This can be used to deform a rectangular display object into a parallelogram.
In PixiJS, skew has a slightly different behaviour than the conventional meaning. It can be thought of the net rotation applied to the coordinate axes (separately). For example, if "skew.x" is ⍺ and "skew.y" is β, then the line x = 0 will be rotated by ⍺ (y = -xcot⍺) and the line y = 0 will be rotated by β (y = xtanβ). A line y = x*tanϴ (i.e. a line at angle ϴ to the x-axis in local-space) will be rotated by an angle between ⍺ and β.
It can be observed that if skew is applied equally to both axes, then it will be equivalent to applying a rotation. Indeed, if "skew.x" = -ϴ and "skew.y" = ϴ, it will produce an equivalent of "rotation" = ϴ.
Another quite interesting observation is that "skew.x", "skew.y", rotation are communtative operations. Indeed, because rotation is essentially a careful combination of the two.
The array has two elements: [x, y]. If y is omitted, both x and y will be set to x.
x
- Property:
x - Type:
number - Optional:
true - Usage:
The global value of X translation
y
- Property:
y - Type:
number - Optional:
true - Usage:
The global value of Y translation
visible
- Property:
visible - Type:
boolean - Optional:
true - Usage:
The global value of visible
sound
- Property:
sound - Type:
string - Optional:
true - Usage:
Define the sound that will be played for all animations in the spritesheet. Remember to create the sound before with the @Sound decorator
framesWidth
- Property:
framesWidth - Type:
number - Optional:
false - Usage:
The number of frames on the width
framesHeight
- Property:
framesHeight - Type:
number - Optional:
false - Usage:
The number of frames on the height
width
- Property:
width - Type:
number - Optional:
false - Usage:
The width of the image (in pixels)
height
- Property:
height - Type:
number - Optional:
false - Usage:
The height of the image (in pixels)
rectWidth
- Property:
rectWidth - Type:
number - Optional:
true - Usage:
Takes a width of a rectangle in the image. Equivalent to width / framesWidth
rectHeight
- Property:
rectHeight - Type:
number - Optional:
true - Usage:
Takes a height of a rectangle in the image. Equivalent to height / framesHeight
offset
- Property:
offset - Type:
number - Optional:
true - Usage:
To take the texture, start at a well defined X and Y position. Otherwise, it starts at 0,0
textures
- Property:
textures - Type:
{ [animName: string]: { animations: Array - Optional:
true - Usage:
Object containing all animations. The key to the object is the name of the animation. The value is a two-dimensional array
ts
textures: {
     myanim: {
        animations: [
             [ { time: 0, frameX: 0, frameY: 0 } ]
        ]
     }
}
The first array represents an animation group. You can put several of them together to create an animation cluster. For example, several explosions with the same spritesheet The second array represents the animation itself which will animate over time. The object indicates, over a period of time (in frame), which part of the spritesheet will be taken (frameX, frameY)
Here are the properties:
time: Time in frameframeX: Retrieve a frame from the spritesheet on the X-axisframeY: Retrieve a frame from the spritesheet on the Y-axisopacitypivotanchorrotationanglescaleskewxyvisiblesound: The sound that will be played during the frame
Extract Animation of Spritesheet
Sometimes the animation is part of the image
ts
textures: {
     myanim: {
         rectWidth: 64,
         rectHeight: 64,
         framesWidth: 10,
         framesHeight: 2,
         offset: {x: 0, y: 230},
         sound: 'my-sound-id', // You can put a sound just for the animation
         animations: [
              [ { time: 0, frameX: 0, frameY: 0 } ]
         ]
     }
}
Above, we can specify which part we want to recover
- We go to the position {0, 230} of the image (
offset) - We recover cells of 64px (
rectWidthandrectHeight) - And we get 20 cells (10 on the width, 2 on the height) (
frameXandframeY)
Advanced
You can create an animation that will be linked to a data. For example, different animation according to a direction of the character.
Full example:
ts
import { Spritesheet, Animation, Direction } from '@rpgjs/client'

@Spritesheet({
     id: 'chest',
     image: require('./assets/chest.png'),
     width: 124,
     height: 61,
     framesHeight: 2,
     framesWidth: 4,
     textures: {
         [Animation.Stand]: {
             animations: direction => [[ {time: 0, frameX: 3, frameY: direction == Direction.Up ? 0 : 1 } ]]
         }
     })
})
export class Chest  { }
It is important to know that
Animation.Standanimation is called if it exists. it only works in the case of an event that doesn't move. The direction is then sent
As you can see, the property contains a function that returns the array for the animation. Here, it is the direction but the parameters depend on the call of the animation. Example:
ts
import { Spritesheet, Animation, Direction, RpgSprite, ISpriteCharacter } from '@rpgjs/client'

@Spritesheet({
     id: 'chest',
     image: require('./assets/chest.png'),
     width: 124,
     height: 61,
     framesHeight: 2,
     framesWidth: 4,
     textures: {
         [Animation.Stand]: {
             animations: str => [[ {time: 0, frameX: 3, frameY: str == 'hello' ? 0 : 1 } ]]
         }
     }
})
export class Chest implements ISpriteCharacter {
     onCharacterStand(sprite: RpgSprite) {
        sprite.animation.play(Animation.Stand, ['hello'])
     }
}
image
- Property:
image - Type:
string - Optional:
true - Usage:
The link to the image
Do not use the
imagesproperty Remember to wrap the link to the image with therequirefunction.
ts
image: require('./assets/hero.png')id
- Property:
id - Type:
string - Optional:
true - Usage:
Spritesheet identifier.
Do not use the
imagesproperty
images
- Property:
images - Type:
{ [id: string]: string } - Optional:
true - Usage:
Put the different images that are concerned by the properties below. The key of the object is the identifier of the spritesheet and the value and the link to the image.
Remember to wrap the link to the image with the
requirefunction.
ts
images: {
   hero: require('./assets/hero.png')
}
Create Animation with Timeline system
new Timeline(options?)
- Since: 4.0.0
- Arguments:
- {
object}options. - Optional configuration object for the Timeline. (Optional:true) - {
number}options.keyframes. - Specifies the number of keyframes for the animation. Defaults to 10. The larger the keyframes, the smoother the animation, but the more resource-intensive it is, as the loop to browse the array will take longer. (Optional:true)
- {
- Example:
ts
const timeline = new Timeline({ keyframes: 20 });- Usage:
Creates a new instance of the Timeline class, which allows for complex animations and control over keyframes.
Add Animation in timeline
- Enum:
Function
| Tag | Description |
|---|---|
| Ease.linear | linear |
| Ease.easeInQuad | easeInQuad |
| Ease.easeOutQuad | easeOutQuad |
| Ease.easeInOutQuad | easeInOutQuad |
| Ease.easeInCubic | easeInCubic |
| Ease.easeOutCubic | easeOutCubic |
| Ease.easeInOutCubic | easeInOutCubic |
| Ease.easeInQuart | easeInQuart |
| Ease.easeOutQuart | easeOutQuart |
| Ease.easeInOutQuart | easeInOutQuart |
| Ease.easeInQuint | easeInQuint |
| Ease.easeOutQuint | easeOutQuint |
| Ease.easeInOutQuint | easeInOutQuint |
| Ease.easeInSine | easeInSine |
| Ease.easeOutSine | easeOutSine |
| Ease.easeInOutSine | easeInOutSine |
| Ease.easeInExpo | easeInExpo |
| Ease.easeOutExpo | easeOutExpo |
| Ease.easeInOutExpo | easeInOutExpo |
| Ease.easeInCirc | easeInCirc |
| Ease.easeOutCirc | easeOutCirc |
| Ease.easeInOutCirc | easeInOutCirc |
| Ease.easeInElastic | easeInElastic |
| Ease.easeOutElastic | easeOutElastic |
| Ease.easeInOutElastic | easeInOutElastic |
| Ease.easeInBack | easeInBack |
| Ease.easeOutBack | easeOutBack |
| Ease.easeInOutBack | easeInOutBack |
| Ease.easeInBounce | easeInBounce |
| Ease.easeOutBounce | easeOutBounce |
- Method:
timeline.add(duration,cb?,transform?) - Arguments:
- {
number}duration. (Optional:false) - {
(obj?: number, time?: number) => TransformOptions[]}cb. (Optional:true) - {
[property: string]: { to:number, from: number: easing?: Function }}transform. (Optional:true)
- {
- Return:
Timeline - Usage:
Allows you to create complex animations more easily. For example, to display a movement with an Easing function
ts
import { Timeline, Ease } from '@rpgjs/client'

new Timeline()
     .add(30, ({ scale }) => [{
         frameX: 0,
         frameY: 1,
         scale: [scale]
     }], {
         scale: {
             from: 0,
             to: 1,
             easing: Ease.easeOutBounce
         }
     })
     .add(100)
     .create()
Here we say
- Duration in frames, allowing you to specify the duration of each animation step. If the timeline respects a specific frame rate, e.g. 60 frames per second, 40 frames correspond to an animation duration of 2/3 of a second for each step.
- A function that will be called every 1 frame with the
scaleproperty defined in transform - An object of transformation. Define the properties of your choice to be passed to the callback function
to: the starting valuefrom: the end valueeasing: An easing function (By default, it is a linear function)
Note that if you just put a duration (add(100)), it will only put a pause on the animation
Easing functions available but you can create your own
ts
function myEase(t: number, b: number, c: number, d: number): number { }t: current time b: start value c: end value d: duration
Create the animation array
- Method:
timeline.create() - Return:
FrameOptions[][]animation array - Usage:
Allows you to create the animation array to assign to the animations property in the Spritesheet
ts
import { Spritesheet, Timeline } from '@rpgjs/server'

@Spritesheet({
 id: 'sprite',
 image: require('./sprite.png'),
 width: 192,
 height: 228,
 framesHeight: 6,
 framesWidth: 6,
 anchor: [0.5],
 textures: {
     myanim: {
         animations: new Timeline()
                         .add(SEE THE ADD METHOD)
                         .create()
     }
 }
})
export class MyAnim {}