Appearance
Step 6. Set Player start in map
Prerequisites
- You must have created a map and added in your game
It is necessary to know
- You can perform several commands on the player. Change hit points, level, etc.
- You can create a
Playerclass to perform commands according to a situation. Here it is when it is connected - You have several ways to position a player
Player Hooks
ts
import { RpgPlayer, RpgPlayerHooks } from '@rpgjs/server'

export const player: RpgPlayerHooks = {
    onConnected(player: RpgPlayer) {
        player.hitbox(32, 16)
        player.setGraphic('hero')
    }
}- Create a
playerobject. The file, in our structure, ismain/server/player.ts. - Indicates the hitbox (width, height) at the foot of the character.
- We give it a graph to give an initial appearance to the player
Make sure the spritesheet is existing. Here,
herois the name of the client-side spritesheet. If it is not the case, see the sprite creation tutorial.
Start Position
Solution 1: Insert a point on Tiled Map Editor
- Go to Tiled Map Editor
- Go to the object layer
- Insert a point on the map
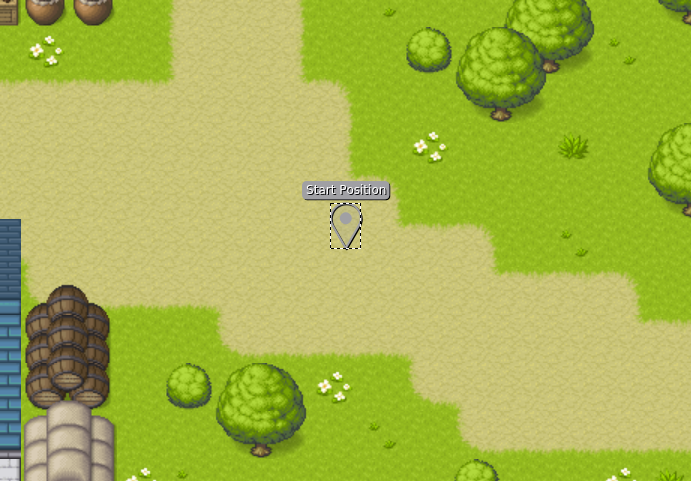
- Set the
starttype
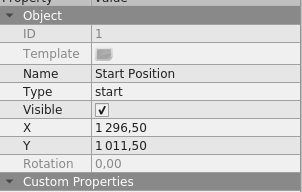
- Go to the map by specifying the ID
ts
import { RpgPlayer, RpgPlayerHooks } from '@rpgjs/server'

export const player: RpgPlayerHooks = {
    async onConnected(player: RpgPlayer) {
        player.hitbox(32, 16)
        player.setGraphic('hero')
        await player.changeMap('medieval')
    }
}Useful: If you set more than one starting point, the player will randomly go to one of the points.
Solution 2: Give coordinate points
Position the player on the map with X and Y positions
ts
import { RpgPlayer, RpgPlayerHooks } from '@rpgjs/server'

export const player: RpgPlayerHooks = {
    async onConnected(player: RpgPlayer) {
        player.hitbox(32, 16)
        player.setGraphic('hero')
        await player.changeMap('medieval', {
            x: 100,
            y: 100
        })
    }
}
Make sure that there is a map with the correct identifier. Here, the
medievalmap exists. Otherwise, read the tutorial on how to create a map.
Good practice
After loading the map, do not continue to do the rest of the code in the onConnected method because the properties will not be synchronized with the client
ts
import { RpgPlayer, RpgPlayerHooks } from '@rpgjs/server'

export const player: RpgPlayerHooks = {
    async onConnected(player: RpgPlayer) {
        player.hitbox(32, 16)
        player.setGraphic('hero')
        await player.changeMap('medieval', {
            x: 100,
            y: 100
        })
        // BAD PRACTICE, because not synchronized on the map
        player.hp = 500
    }
}
Make your code in the onJoinMap() hook:
ts
import { RpgPlayer, RpgPlayerHooks } from '@rpgjs/server'

export const player: RpgPlayerHooks = {
    async onConnected(player: RpgPlayer) {
        player.hitbox(32, 16)
        player.setGraphic('hero')
        await player.changeMap('medieval', {
            x: 100,
            y: 100
        })
    },
    // GOOD PRACTICE
    onJoinMap(player: RpgPlayer) {
        player.hp = 500
    }
}
Add Player class in your game engine
In main/server/index.ts
ts
import { RpgServer, RpgModule } from '@rpgjs/server'
import { player } from './player'
import { MedievalMap } from './maps/medieval.ts'

@RpgModule<RpgServer>({
    maps:  [
        MedievalMap
    ],
    player
})
export default class RpgServerEngine { }