Appearance
Step 2. Create a tileset for the map
Prerequisites
- You must have an image representing the tileset
- To create a tileset, you need the Tiled Map Editor : https://www.mapeditor.org/
It is necessary to know
- Tile sizes may vary. In the example below, the size is 32px*32px but you can have more or less tile size.
- The width and height of the tileset does not matter. However, avoid having images that are too large. This may cause an error with WebGL
- You can have several tilesets for one map.
Create a spritesheet for this tileset
Here is the spritesheet we will use:
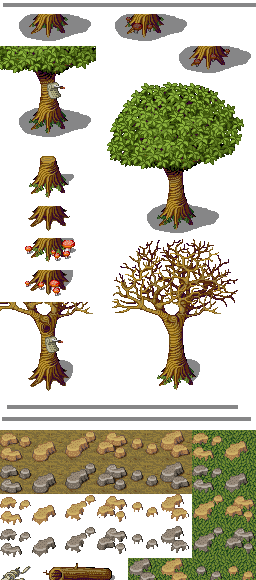
Warning, the image above is only a part of the tileset
DANGER
For a tileset compatible with WebGL 1 (mainly mobiles), the image must be at most 4096*4096px
DANGER
The size of the tiles must not exceed the dimensions of the image. For example, if the width of a tile is 32px but the width of the tileset is 60px then there will be a problem. The width of the tileset must be 64px
Define collisions
First of all
- Create a new tileset with Tiled Map Editor (
File>New>New Tileset) - Set source and width and height of tile
- Save file to
medieval.tsxinsrc/server/maps/tmx
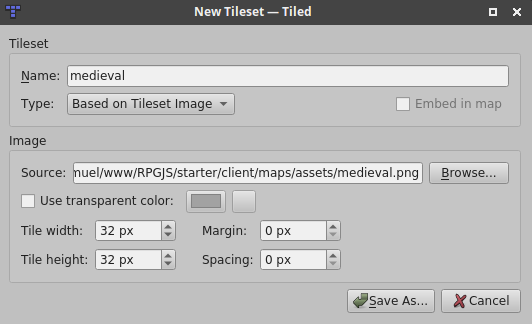
Solution 1: Collision on a tile
- Select the tile (or several at the same time) and set a new property
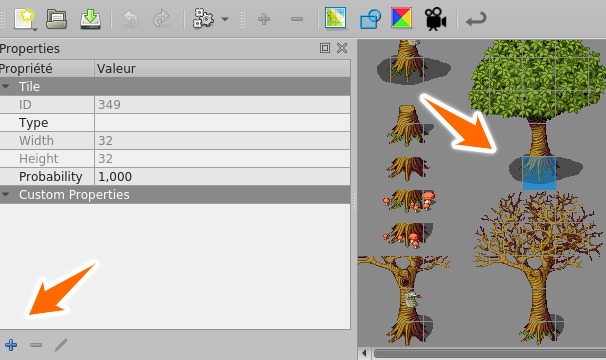
- Add the
collisionproperty of typeBOOL

- Check the
collisionproperty on the selected tile
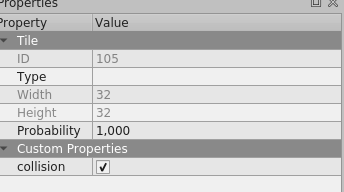
Solution 2: Precise collision with a polygon
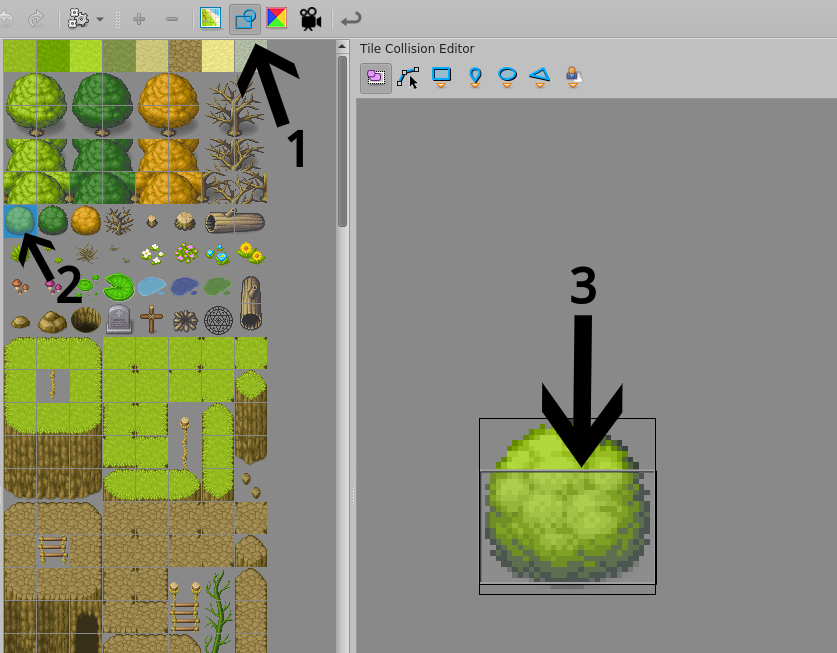
- Select
Tile Collision Editor - Choose the tile
- Put a polygon on part having a collision
Define overlays
To define an overlay, you have two solutions. Either indicate that the layer is above the events, or the tile itself
Solution 1: Z layer
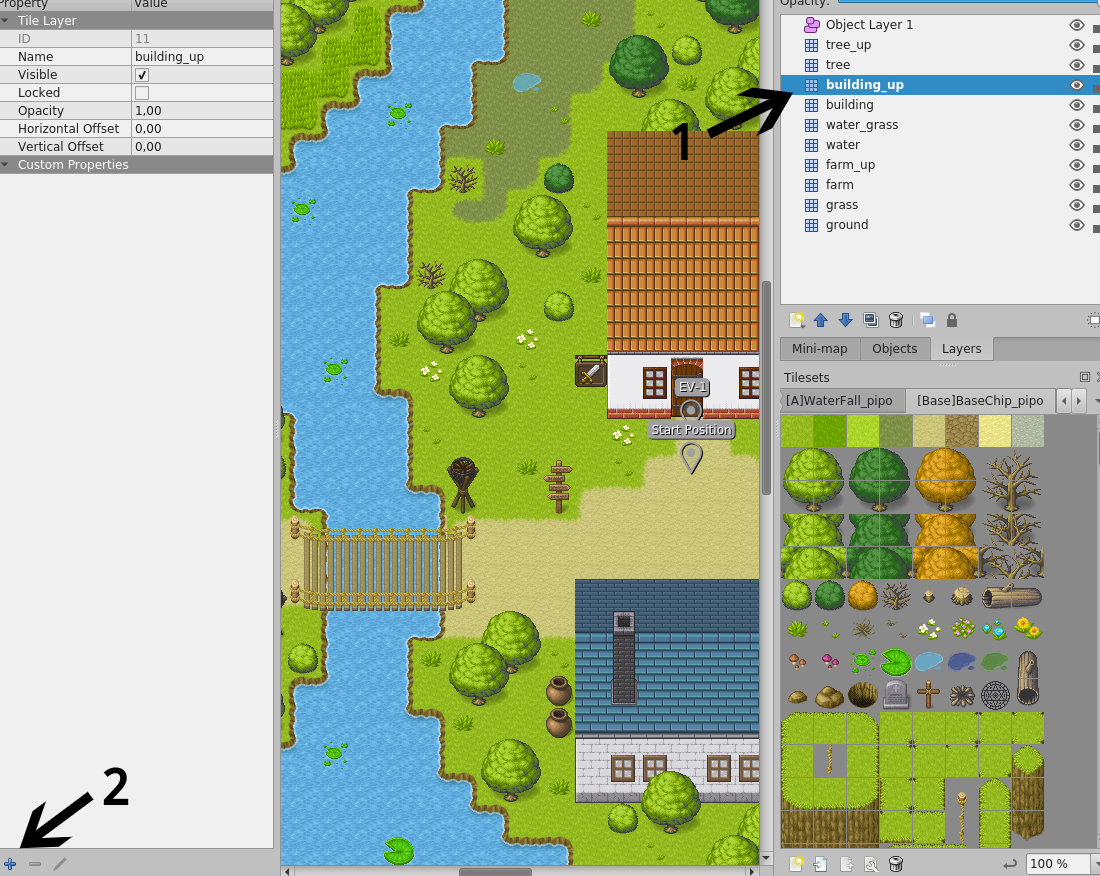
- Click on the layer
- Add a property by clicking on the plus icon

- Add the property named
zofinttype
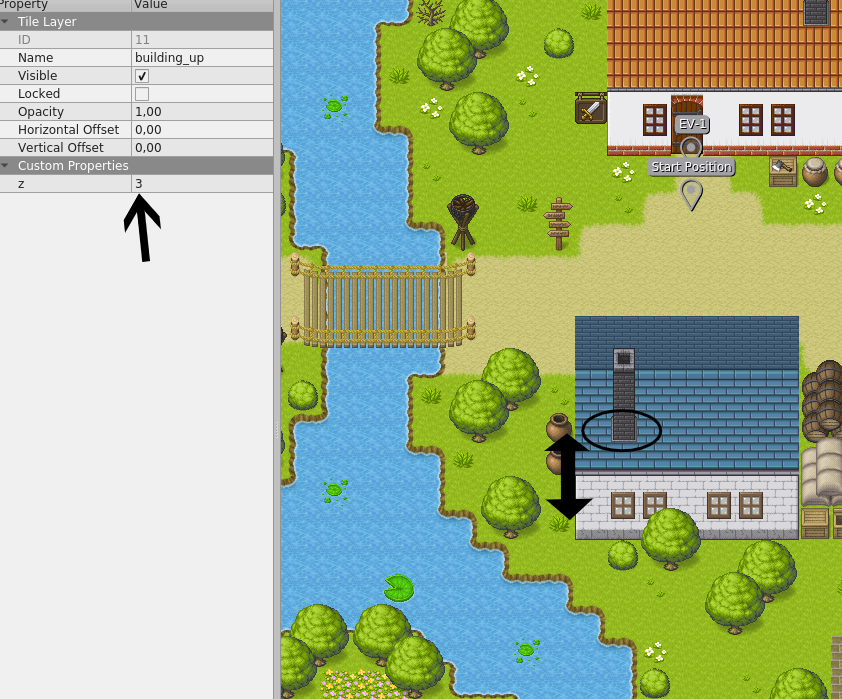
The z value is the height (in number of tiles) in the terrain (grass for example) and the elements of the new layer.
For example, in the image above,
- z = 0 (the grass, the hero's feet)
- z = 1 (The middle of the wall of the house, The middle of the wall of the house)
- z = 2 (The top of the wall of the house, the beginning of the roof of the house)
- z = 3 (The beginning of the chimney, the middle of the roof)
- z = 4 (The top of the roof)
It is important to respect the z-positions. Because by putting good z values, you could later (in future versions of RPGJS) play with heights (make a bridge, make an object fall, etc.).
Solution 2: Z tile (May be complementary with the first solution)
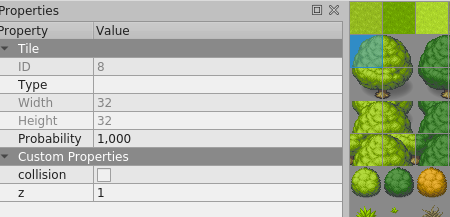
- Select a tile
- Set the
zproperty
Note that the z-value is added to the z-value of the layer. For example, in the image above, the top of the trunk is on z=1. But if the tree is on a layer of z=2 then the true value of the top of the trunk will be z=3.
Case of overlay of a tile with a precise collision
You may have problems with overlapping (See above). The image below shows the hero's feet over the bush

To remedy this problem, give the z-value on the tile correctly. Here, the bush is at the same level as the hero's feet. So we put z=0

The problem is solved!
