Appearance
Create map
Prerequisites
To create a map, you need the Tiled Map Editor : https://www.mapeditor.org/
1. Create tileset
- Create a new tileset with Tiled Map Editor (
File>New>New Tileset) - Set source and width and height of tile
- Save the TSX file in
main/server/maps/medieval.tsx
TIP
- Tile sizes may vary. In the example below, the size is 32px*32px but you can have more or less tile size.
- The width and height of the tileset does not matter. However, avoid having images that are too large. This may cause an error with WebGL
- You can have several tilesets for one map.
Here is the spritesheet we will use. Save the PNG file in main/server/maps/medieval.png
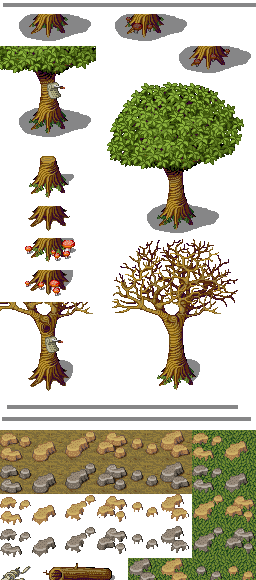
Warning, the image above is only a part of the tileset
DANGER
For a tileset compatible with WebGL 1 (mainly mobiles), the image must be at most 4096*4096px
DANGER
The size of the tiles must not exceed the dimensions of the image. For example, if the width of a tile is 32px but the width of the tileset is 60px then there will be a problem. The width of the tileset must be 64px
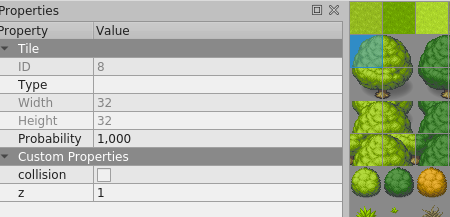
Collision on a tile
- Select the tile (or several at the same time) and set a new property
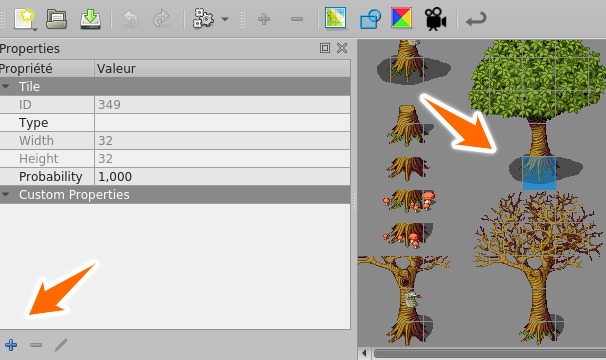
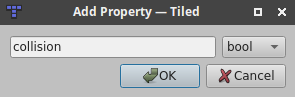
- Add the
collisionproperty of typeBOOL
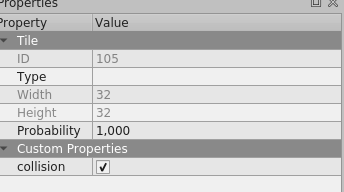
- Check the
collisionproperty on the selected tile
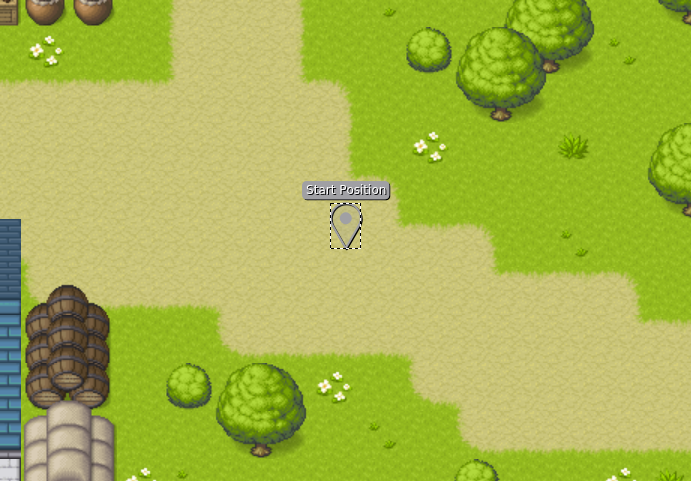
tile above the character (Z Tile)
- Select a tile
- Set the
zproperty
Note that the z-value is added to the z-value of the layer. For example, in the image above, the top of the trunk is on z=1. But if the tree is on a layer of z=2 then the true value of the top of the trunk will be z=3.
2. Create map with Tiled Map Editor
- Create your map and save the TMX file in
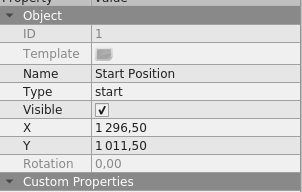
main/server/maps/medieval.tmx - Create object layer
- Insert a point on the map
- Set the
starttype
3. Create Map class
- Create a new file:
main/server/maps/medieval.ts - Then, the code must be as follows
ts
import { RpgMap, MapData } from '@rpgjs/server'

@MapData({
    id: 'medieval',
    file: require('./tmx/medieval.tmx'),
    name: 'Town' // optional
})
export class MedievalMap extends RpgMap { }- Put an identifier to the map. this information will be used if you want to load maps to a player.
- Set the absolute path to the tmx file.
4. Add Map in your Game
In main/server/index.ts :
ts
import { RpgServer, RpgModule } from '@rpgjs/server'
import { MedievalMap } from './maps/medieval.ts'

@RpgModule<RpgServer>({
    maps:  [
        MedievalMap
    ]
})
export default class RpgServerEngine { }- Add the map created in the property
mapsin the@RpgModuledecorator